Create a Custom Role
You must be an administrator/owner at the organization level to create a custom role.
- Navigate to Settings > Manage Users.
- Select Add custom role.
- Enter a name for the new role.
NOTE: You can use up to 25 characters, using letters (A–Z, a–z) and numbers (0–9).
- Select the desired capabilities for the role. Remember, it includes all the collaborator capabilities by default.
- Select Create Role.
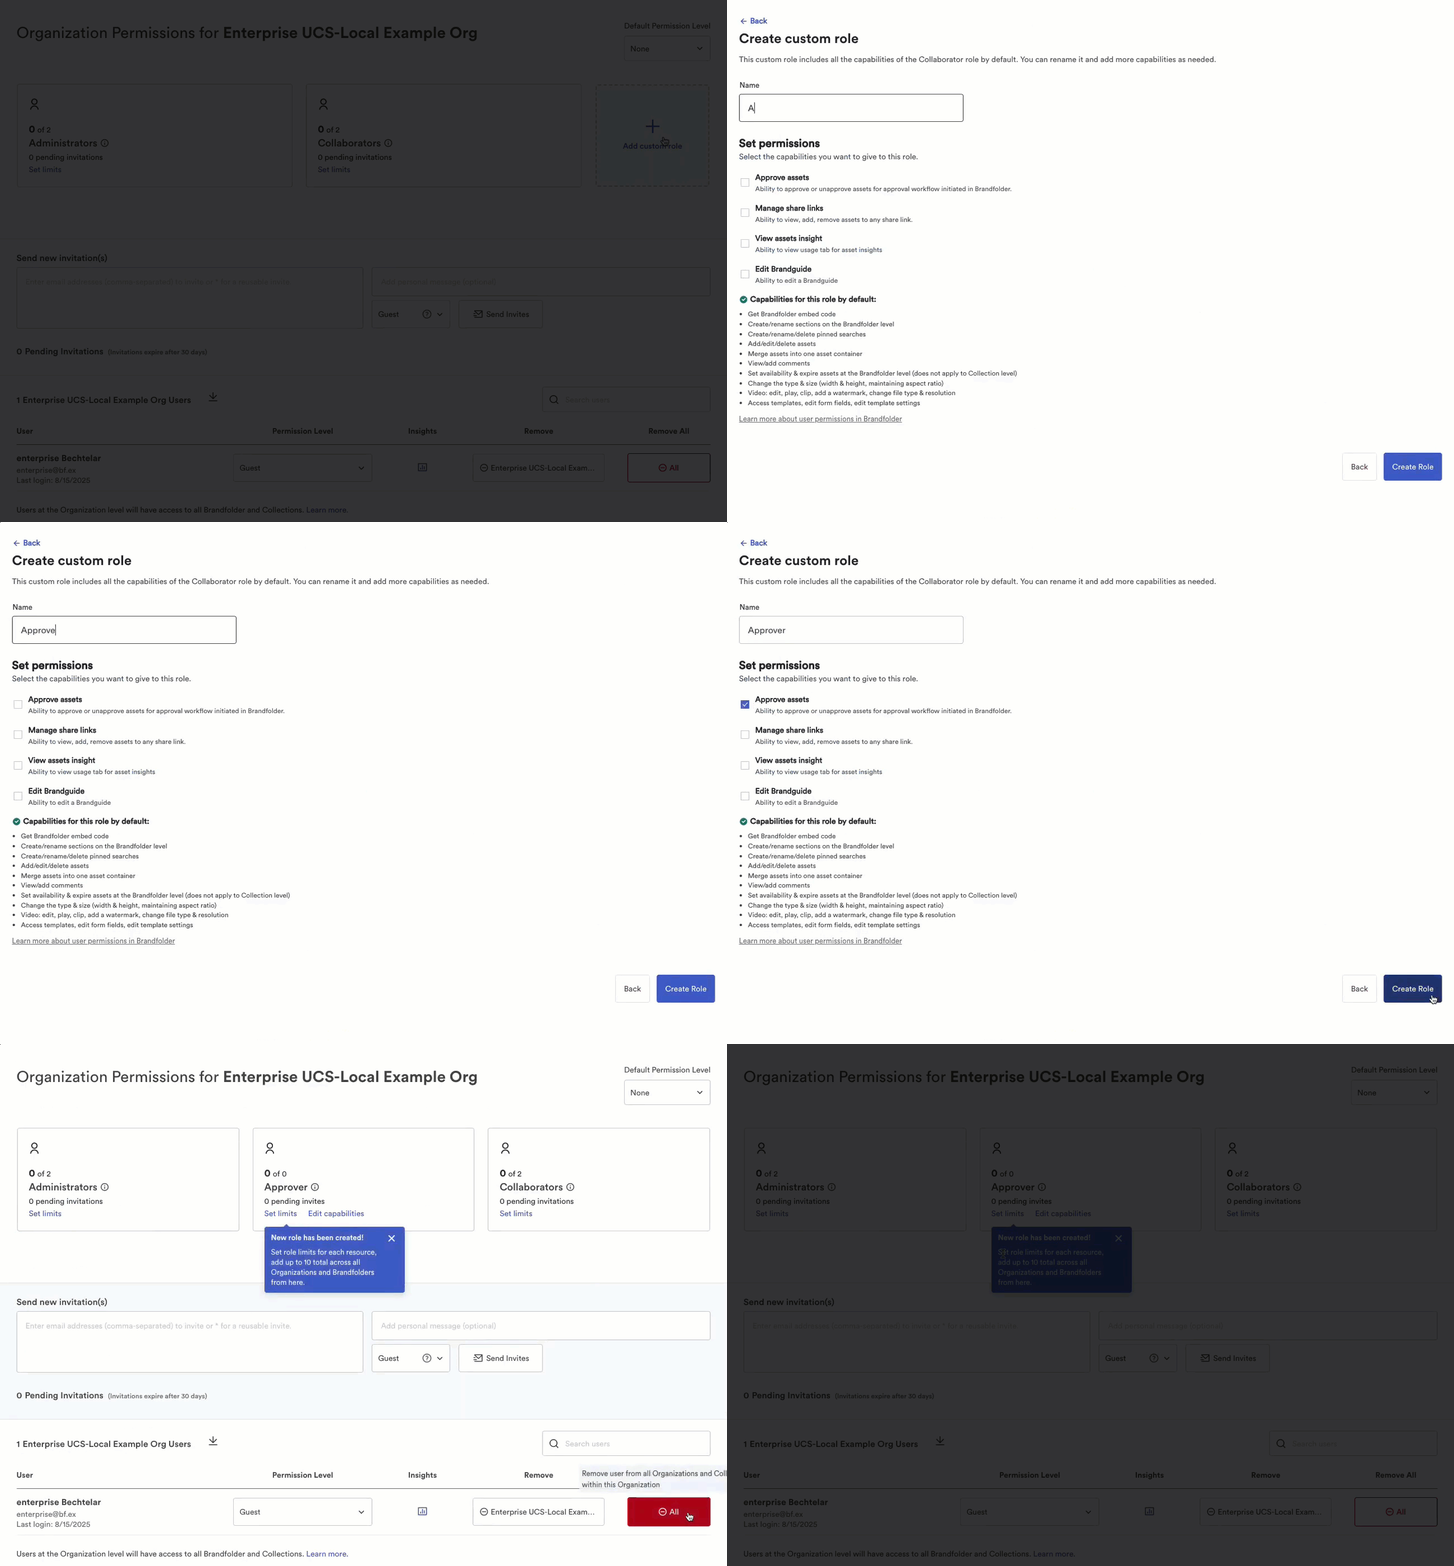
The new role is created and added as another tile, along with the Administrators and Collaborators.
This role appears in the permission level dropdown when you send an invitation or edit a user's permission level.
TIP: If you're over or nearing the plan limits, you might want to adjust the user seat limits after creating the new custom role.
Edit a Custom Role
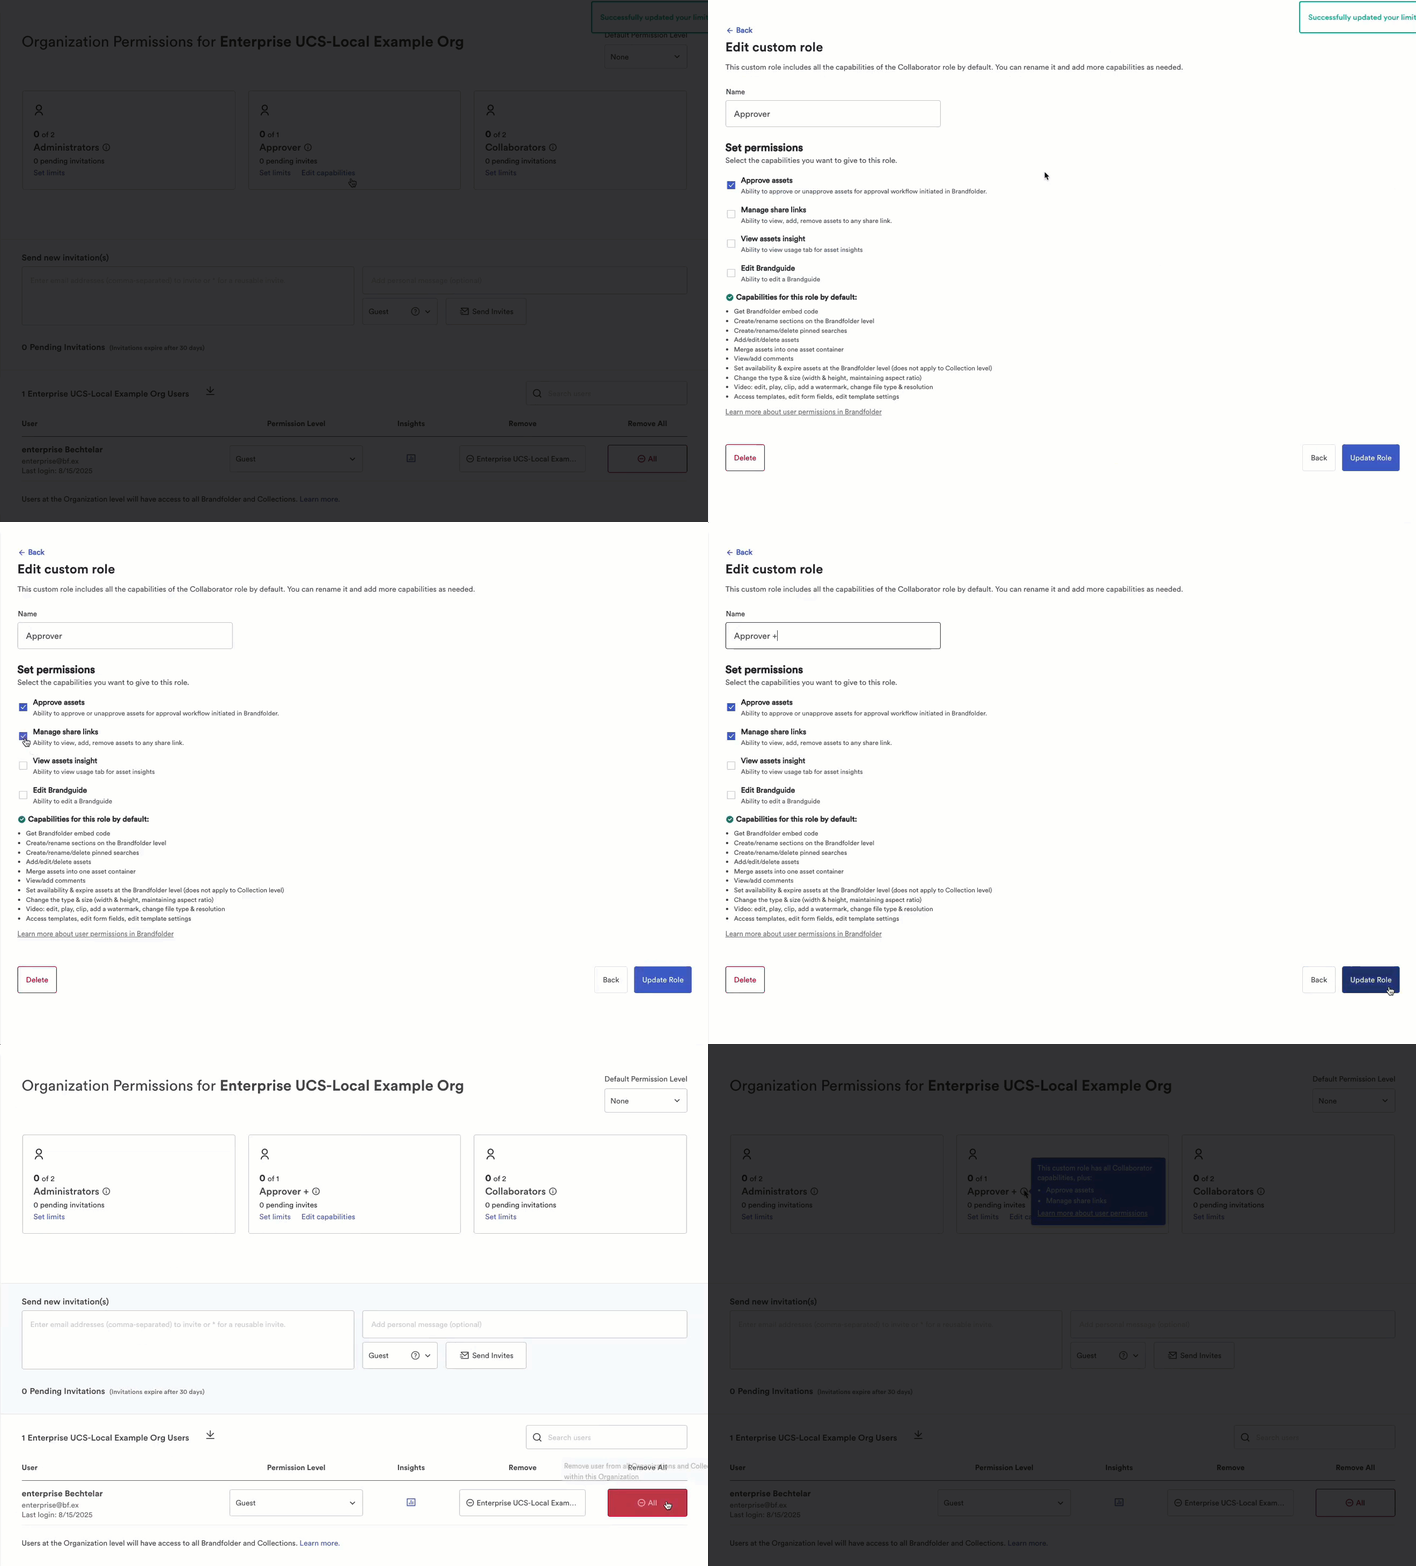
- In the custom role, select Edit role.
- Rename the custom role, or add or remove capabilities as desired.
- Select Update Role.
Delete a Custom Role
- In the custom role, select Edit role.
- Select Delete.
- In the modal that appears, select Delete Role.